A few years back, you needed either a bottomless pit of money or coding skills to build an app. But now, things have changed.
Anyone who wants to invest in an app development project – regardless of their budget or tech expertise – has the ability to do so.
The question is, which option is best for you? And what does the process actually look like when you create an app from scratch?
In this blog, we’re going to help you answer both of these questions. But before that, I’d like to signpost some helpful key resources…
App creation resources: From pre-launch to post-launch
The following blogs will help to provide extra context on all the steps we cover in this blog, ensuring that no stone is left unturned in your journey to creating an app:
Pre-launch resources
101 app ideas for entrepreneurs | 14 transformative mobile app benefits | Website vs app: Which is best for your business? | Definitive guide to app development cost | How to use prototypes to get app funding
Launch resources
How to upload apps to Google Play Store | How to submit apps to the Apple App Store
Post-launch resources
App marketing
Ultimate guide to app marketing | Sustainable app monetization strategies
App performance
Ultimate guide to mobile app maintenance | How to conduct an app SWOT analysis | How to increase app downloads | Key mobile app metrics you should track
Now, let’s get into the nitty gritty 👇
Analysed: The 5 main ways to create apps
There are many ways you can go about creating your app. However, the size of your business, the resources at your disposal and the purpose of your application all influence your app development route.
We’ve broken down the pros and cons of the four most established app creation methods below:
Self code | Freelancer | No-code app builder | Dev agency | Builder.ai | |
Budget friendly | ✅ | ✅ | ✅ | ❌ | ✅ |
Fast development speed | ❌ | ❌ | ✅ | ❌ | ✅ |
High customizability | ❌ | ❌ | ❌ | ✅ | ✅ |
Beginner friendly | ❌ | ✅ | ✅ | ✅ | ✅ |
Clear timelines | ❌ | ❌ | ✅ | ❌ | ✅ |
Own the code | ✅ | ✅ | ❌ | ✅ | ✅ |
Fully managed service | ❌ | ❌ | ❌ | ✅ | ✅ |
1 - Self code: For developers and technical entrepreneurs
If you have technical skills and you don't have strict project deadlines, coding your own app is the most attractive app building route. Here's everything you need to know:
Pros
- You can drive cost of app development down by upskilling yourself with free educational resources readily available on the web
- You own your code if you write it, meaning you have total control of your app environment, rather than relying on dev agencies or app builders
Cons
- Extremely time intensive, meaning your free time will be consumed by the project
- You have to resolve technical issues yourself and may need to invest in further education or third-party help to do so
- Sophisticated, scalable software is tough to create alone, given your time and resource restraints
2 - Freelancer: For non-technical entrepreneurs on a budget
Working with freelancers can be a great option if you’re on a shoestring budget and can work without clear timelines. Sites like Upwork and Fivver make it easy to find freelancers with the skillset you’re looking for.
Pros
- Cost of app development is lower than working with agencies
- You can access a diverse pool of talent worldwide
Cons
- Freelancers are not consistent, leading to potential delays and budget overruns
- All freelancers are not equally skilled, meaning your project may not turn out as you envisioned
- Regular communication challenges due to different time zones and language barriers lead to misunderstandings
3 - No-code app builder: For non-technical entrepreneurs creating simple apps
No-code app builders are app-building software platforms. They allow non-technical users to quickly and cost-effectively build simple web and mobile apps and have the following up and downsides:
Pros
- No tech expertise needed to build an app, thanks to drag-and-drop interface
- Fast to build because templates are reusable and can be personalised
Cons
- You’re locked into monthly payments for your app as long as it’s in use, meaning you could pay over the odds to keep it live
- Rigid templates mean you can’t scale your app as you grow, or improve your app’s sophistication over time
- You don’t own the code, so it may be challenging to migrate your app to another provider or make customisations to your app without starting completely from scratch
- You may need to complete educational courses just to use your chosen app builder
Read our comparison of the best no-code app builders 👈
4 - Development agency: For businesses needing custom, scalable apps
If your developers don't have the resources to dedicate to a mobile app development project, or you don't quite have the capacity to hire an internal team, you're in luck. Because plug-and-play teams can fill the gap and build powerful, custom-code apps. Here's what you need to know:
Pros
- You don’t need to burden internal teams with your app project, as app development teams take responsibility for everything
- You own the code, meaning you have complete control over your mobile app development roadmap
- Your app is secure and scalable because it’s custom coded, meaning you can protect customer data and meet emerging business needs
Cons
- Cost of app development can skyrocket if you’re on a retainer and the project overruns
- Liaising with developers can be difficult and confusing, particularly if you're you don’t have technical skills
- You have limited visibility on your project, meaning you may not be happy with the final result
5 - Builder.ai: Hybrid approach to create apps (for every business size)
Builder.ai is an all-in-one solution, offering a middle ground between no-code app builders and dev agencies. On the one hand, you can create apps cost-effectively and at speed. On the other hand, you’re not restricted by templates and have the ability to level up your app as you scale.
This means everyone – from non-technical users founding their own startups to large enterprises looking for extra resources – can use the platform.
Pros
- No coding skills needed as humans and AI work together to assemble your app
- Guaranteed pricing means there are never any nasty surprises down the line
- Project progress is viewable in a central dashboard meaning you’re never out of the loop on timelines and activity
- You own the code so you have total autonomy over your app development roadmap and can easily migrate to another platform (once your payment plan is complete)
- Fully managed service means you don't need to liaise with developers once you’ve shared your app idea and chosen your features
Cons
- Not for technical entrepreneurs looking to code their apps themselves
Want to start your app project with us?
Book a demoSpeak with one of our product experts today.
By proceeding you agree to Builder.ai’s privacy policy and terms and conditions

Which development method is right for you?
As you can see you have multiple development methods. But which one is right for you?
If you have tech skills, you can code it yourself. This gives you full control, but bear in mind it requires time, ongoing maintenance and deep technical expertise.
Hiring a freelancer can be cost-effective for small projects. However, reliability can be an issue, and scaling your app later may be difficult if you rely on a single developer.
No-code app builders let you create basic apps quickly. While they’re great for MVPs, they offer limited flexibility and may not support complex features.
A development agency can build a fully custom app, but costs can spiral, and timelines often extend beyond the initial estimate.
This is where Builder.ai stands out. Builder.ai gives you custom-built apps without the need for coding or dealing with freelancers or agencies. You get fixed costs, predictable timelines and a fully managed development process—so you can focus on growing your business.
How to create an app from scratch in 14 steps
By now, you’ve either decided that you’re creating your app yourself or you’re working with an app development partner.
The following guide will be most relevant to people in the latter category, so if you’re coding your own app from scratch, we wish you luck and bid you farewell.
For everyone else, keep scrolling 👇
1 - Define your goals
There are umpteen different motivations for greenlighting an app project.
Maybe you’re starting to sell online. Maybe you want to scale your business up. Maybe you want to improve organisational efficiency.
Hell, you might even want to change the world.
But whatever it is, you need a North Star. Otherwise, it’ll be too easy to mainline TikTok content and push your project aside.
Establishing well-defined goals ensures your app development efforts remain focused and aligned with your overarching objectives.
Don’t know how to define your goals? Don’t worry.
Start by writing down your vision and mission. Your vision would be the end goal of your app and your mission is what you need to do to achieve that vision.
After you’ve done that, set out your business objectives. Make them SMART (specific, measurable, achievable, relevant and time-bound). For instance, a couple of your key goals could be to:
- Achieve 50,000 registered users within the first year
- Generate $1 million in revenue within three years
2 - Get a problem statement
Unfortunately, a lightbulb moment doesn’t necessarily translate into a successful app.
Instead, you need to refine your app idea and work out exactly how it’s going to support your goals.
A problem statement helps you do just this.
In it, you’ll collect all the info on the problem you’re trying to solve, who your target audience is, what their pain points are and your solution. Here’s how you can do just that:
How to write a problem statement
- Identify the problem - focus on the root cause rather than the symptoms
- Understand the context - learn about the factors that contribute to the issue
- Formulate problem statement(s) - write in clear and easy-to-understand language
- Break down the problem - divide the problem into smaller components
- Propose solutions - choose solutions that best align with your goals
3 - Research your competitors
As the legendary boxer Mike Tyson once said, "Everyone has a plan—until they get punched in the face." In the world of apps, this sentiment holds true, especially when developing an app from scratch.
So if you don’t minimise the amount of punches you receive, you need to assess your competitor’s app positioning, marketing and pricing strategies so that you can learn from their wins and capitalise on their failures.
Performing a competitive analysis is key to effectively positioning your app and building features that allow you to win market share. This is especially important as the new kid on the block, without the brand recognition of more established players.
4 - Choose an app template
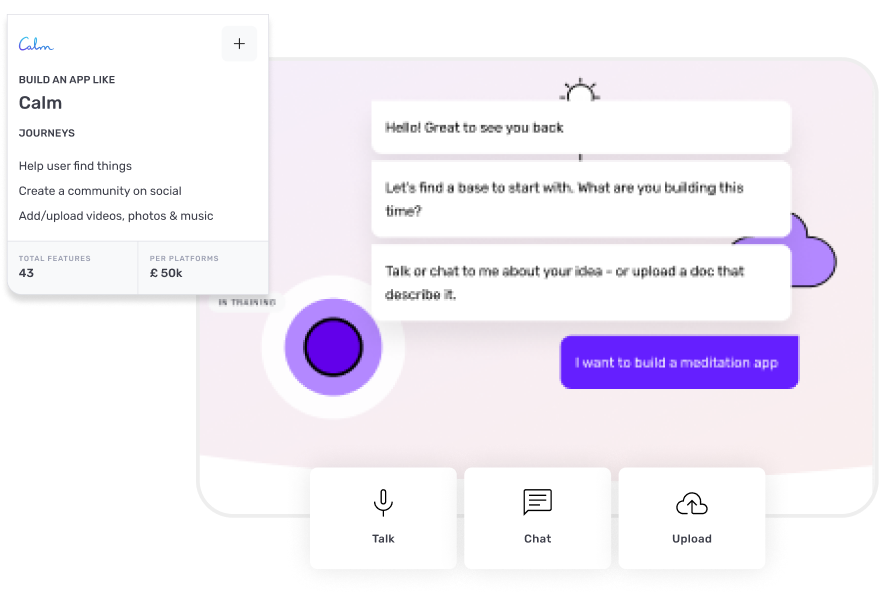
Now that you’re done with the boring (but important) things, let’s get to the fun stuff.
When you work with an app builder, they provide you with a wide range of pre-designed templates to choose from as a base for your app. Then, you choose the one that aligns with the type of app you want to create.
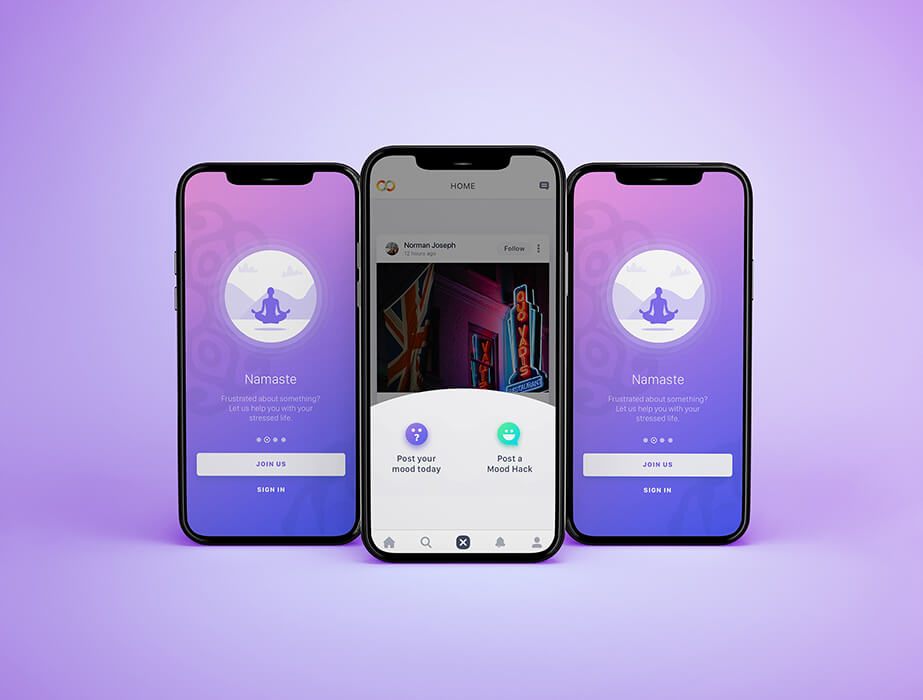
For instance, mental health apps share lots of common features, with minor differences in the layout and themes. This is because customers have developed a habit of using them in a certain way.
Where most of this work is DIY with no-code, with Builder.ai, our AI Product Manager, Natasha, finds relevant app templates for you (based on the world’s favourite apps). All you need to do is chat through your ideas with her through voice, text or document upload and she’ll give you precise feature recommendations.
These features are organised into journeys, with each journey representing a specific goal someone using your app might have – for example, “help young professionals find meditation courses”.
This journey would include features to split these courses into different audience groups like “beginners” and “advanced” to help users find the most appropriate course for them.
Learn more about how we use AI to streamline the app creation process 👈
5 - Customise app features
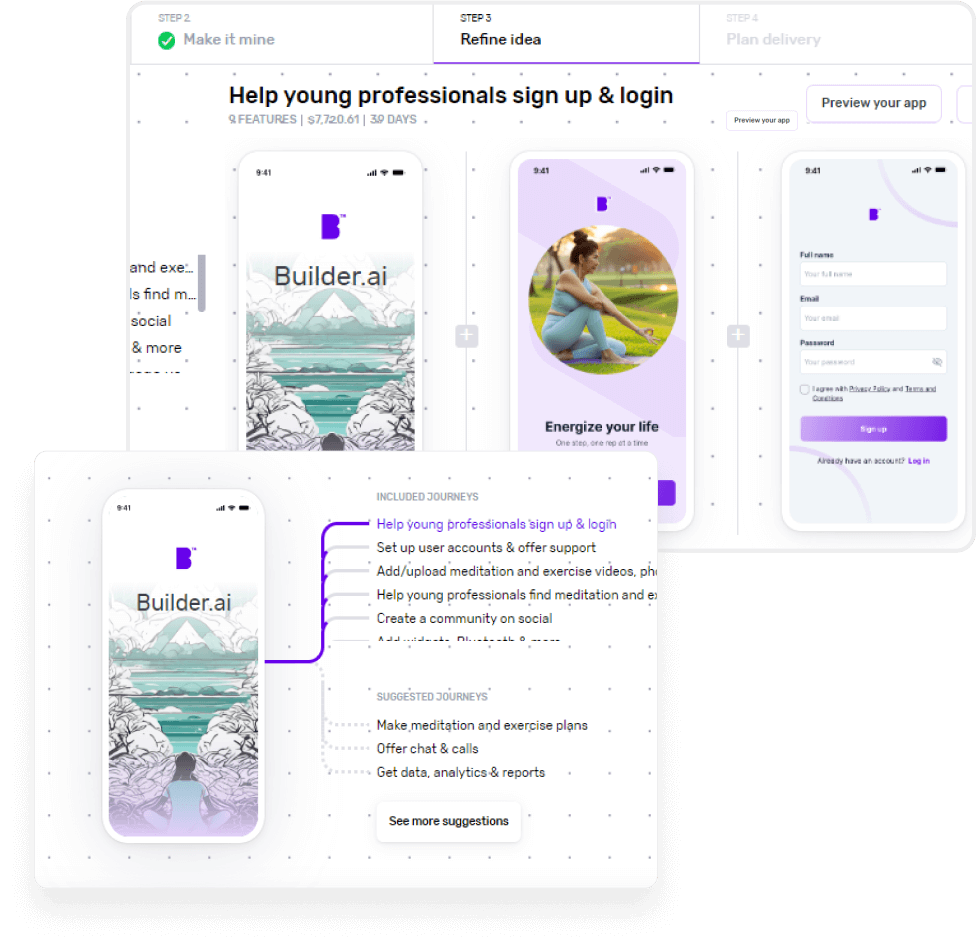
Once Natasha has suggested the journeys your app needs, you can pick and choose the ones you want. .
By contrast, with a no-code app builder, you have to drag and drop features you think are most relevant to your app.
6 - Choose the right platform (iOS, Android or both)
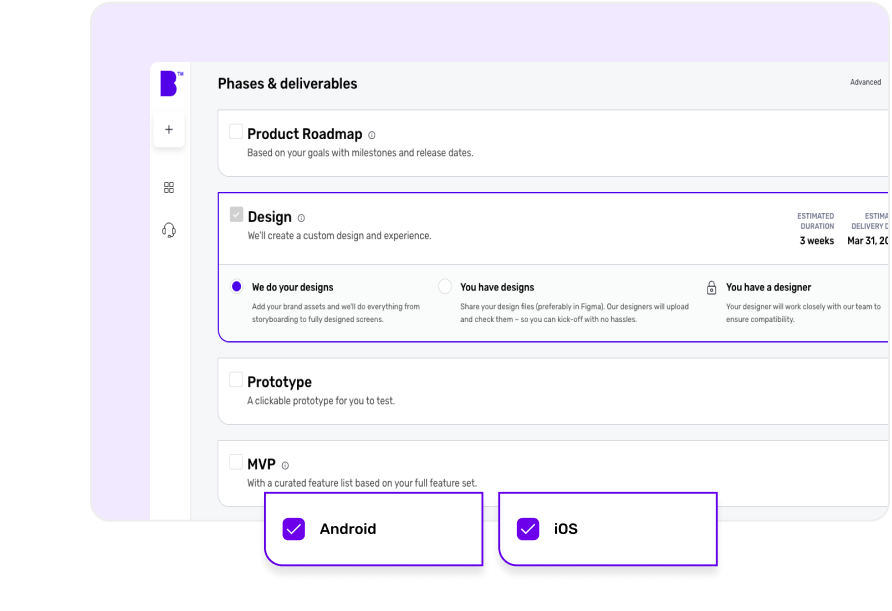
Deciding on the mobile platform you want to prioritise should be a walk in the park, whether that’s creating an app for Android or developing an iOS app.
One problem you may encounter is if you have 50/50 split between your user base.
This is why it’s helpful to work with Builder.ai, as our native app development helps you create apps for both mobile platforms simultaneously.
You also have the option to choose different project types, whether that’s an app design, an app prototype or an MVP.
7 - Get a fixed price and accurate timelines
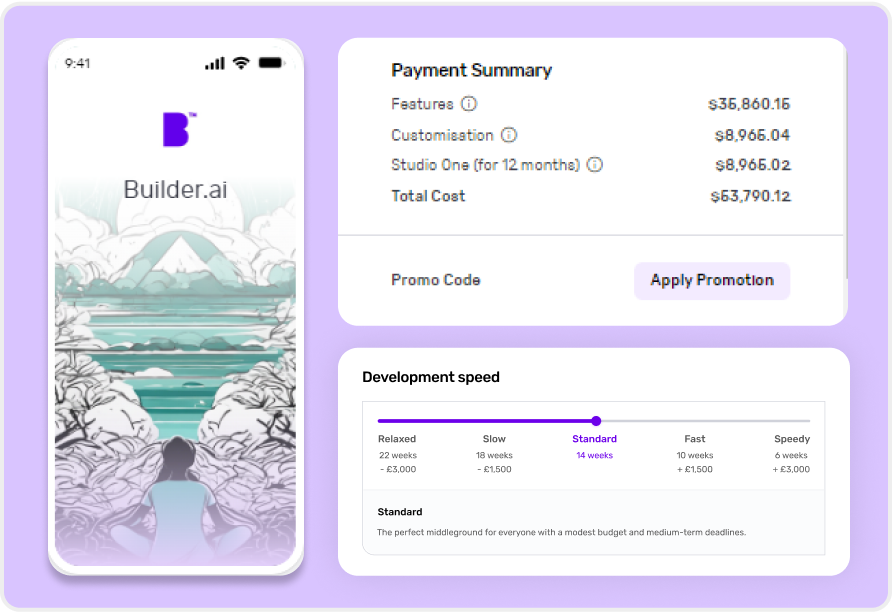
As most no-code app builders operate on a software-as-a-service (SaaS) payment model and most development agencies charge by the hour, it can be challenging to get a straight answer on your app development cost.
However, Builder.ai charges per feature.
This allows us to give you a complete breakdown of all your costs before you commit to your project, allowing you to accurately plan your budget and ensuring there are no nasty surprises down the line.
You can also choose your development speed with prices adjusting according to option you choose; for example, “Speedy” costs more than “Relaxed”.
And if your app takes us longer than expected to develop any of your features, we cover the costs, rather than charging you extra billable hours.
8 - Sketch your app layout
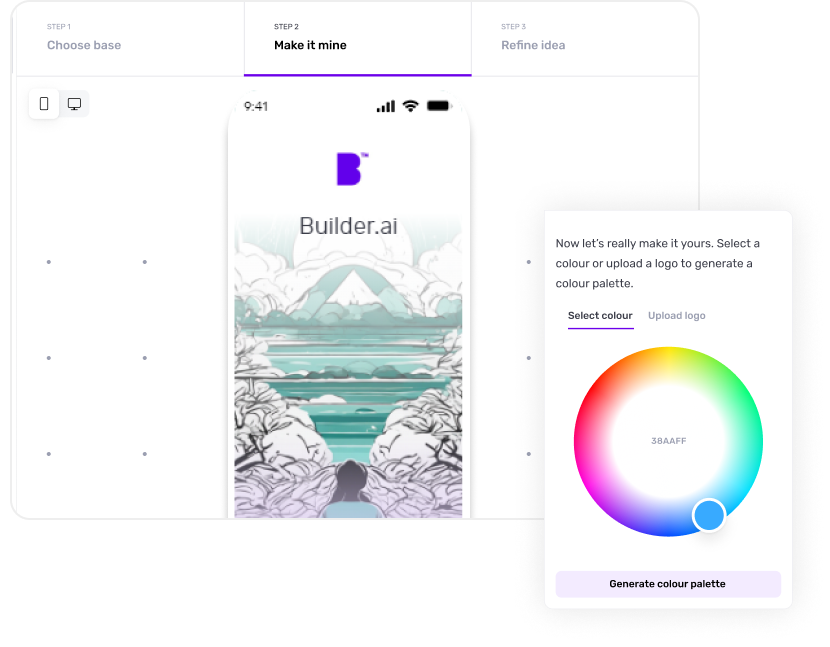
When you create an app with Builder.ai, you can instantly see how your app will look by giving Natasha your brand colour, logo and website URL. She imports this information to give you an accurate preview of your app design.
Here’s what the whole design process looks like:
1 - Wireframes
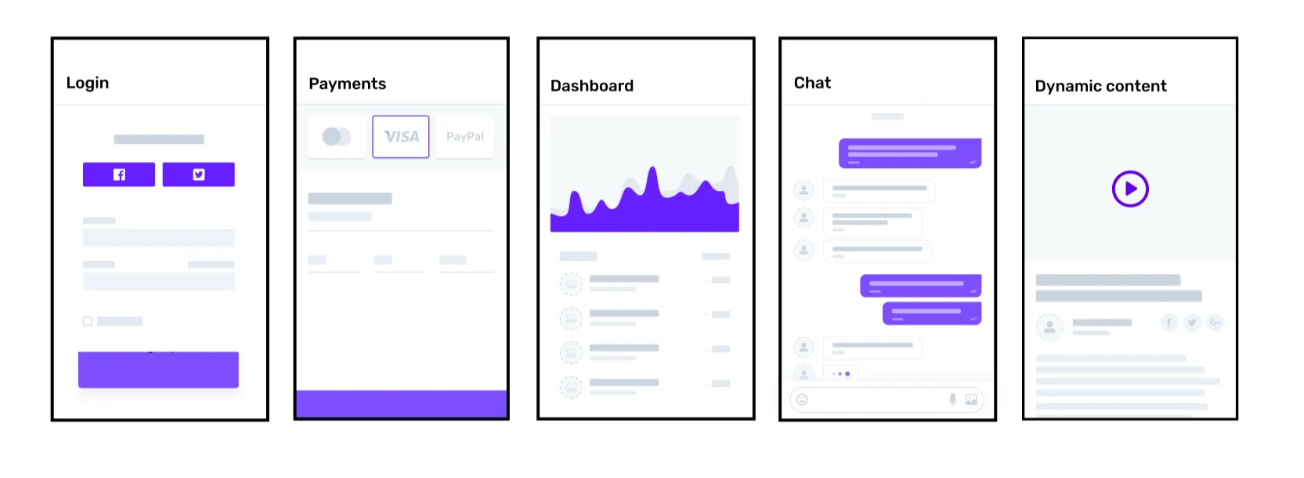
Wireframes serve as a skeletal blueprint of your app designs, outlining the layout, structure and functionality of your app’s screen and features.
That means in their early stages, they lack detailed visuals, colours and graphics. But as they progress and elements are added, they become mockups.
2 - Mockups
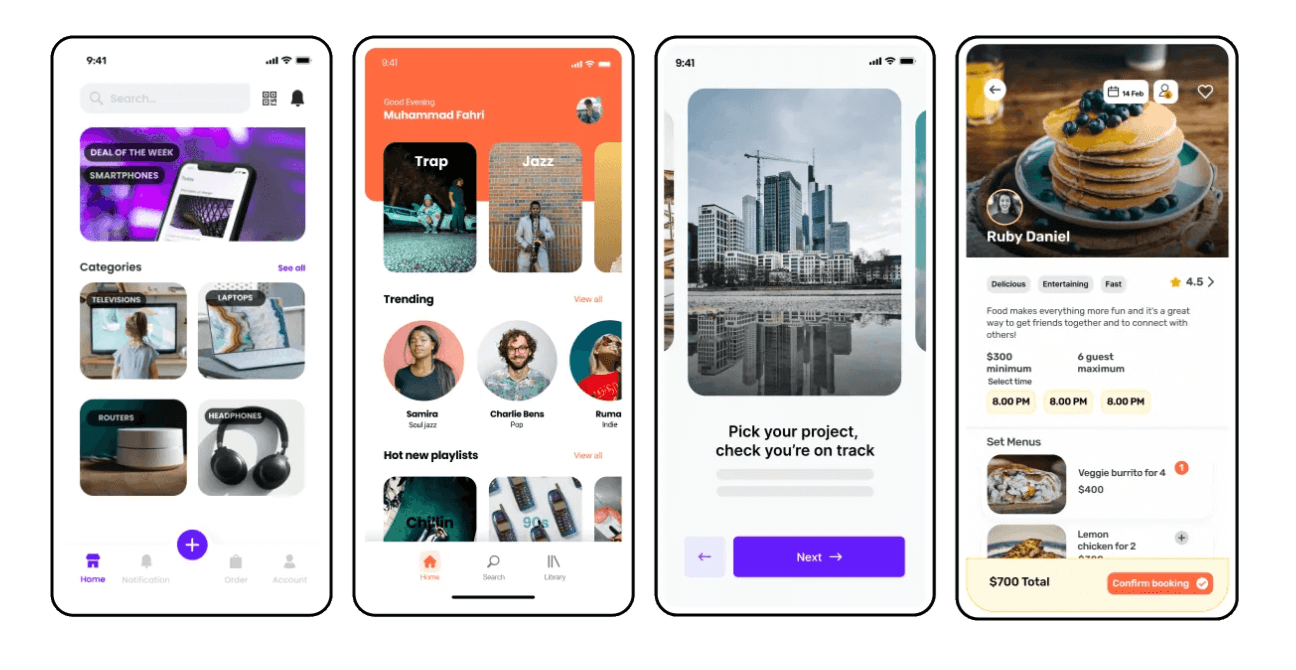
An app mockup is a visual representation of your app's design. It's essentially a screenshot of your app's layout, user interface and overall design elements, but doesn't have any functionality.
They’re different from wireframes as they contain more stylistic UI details and show how your app will look after production.
While creating an app mockup, you need to think about fonts, background colour palette, white spaces, content layout, typography and everything visual.
Once you have this, you can move to the prototyping stage.
3 - Prototypes
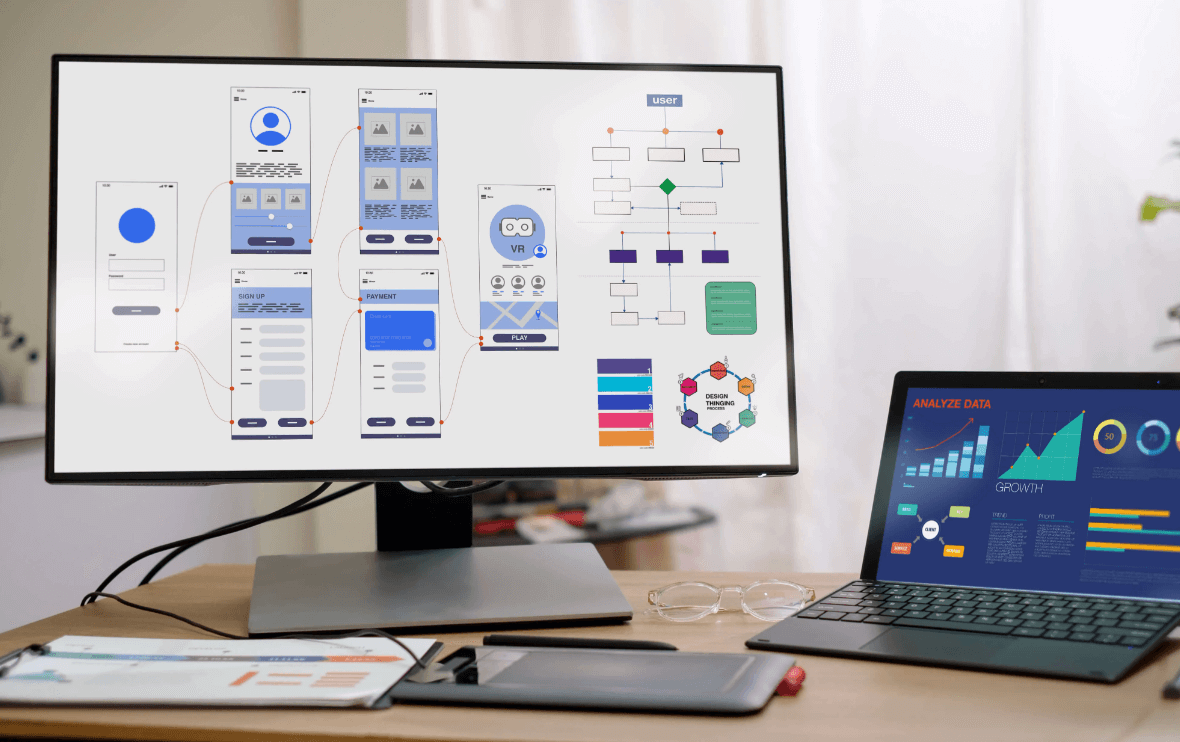
An app prototype is a fully functional, interactive mockup that has clickable features and looks similar to the final product.
It’s one step ahead of the app mockup that combines both the UI and UX elements of your app.
Where mockups give you the “look” of the final product, prototypes allow you to experience and get the “feel” of the final product.
Importantly, this allows you to get feedback from other stakeholders, iterate on your initial design layouts before actually coding your app.
As a result, you can keep development costs to a minimum by avoiding mistakes early on in the app-making process.
Prototype your app with Builder Now 👈
9 - Map out user journeys
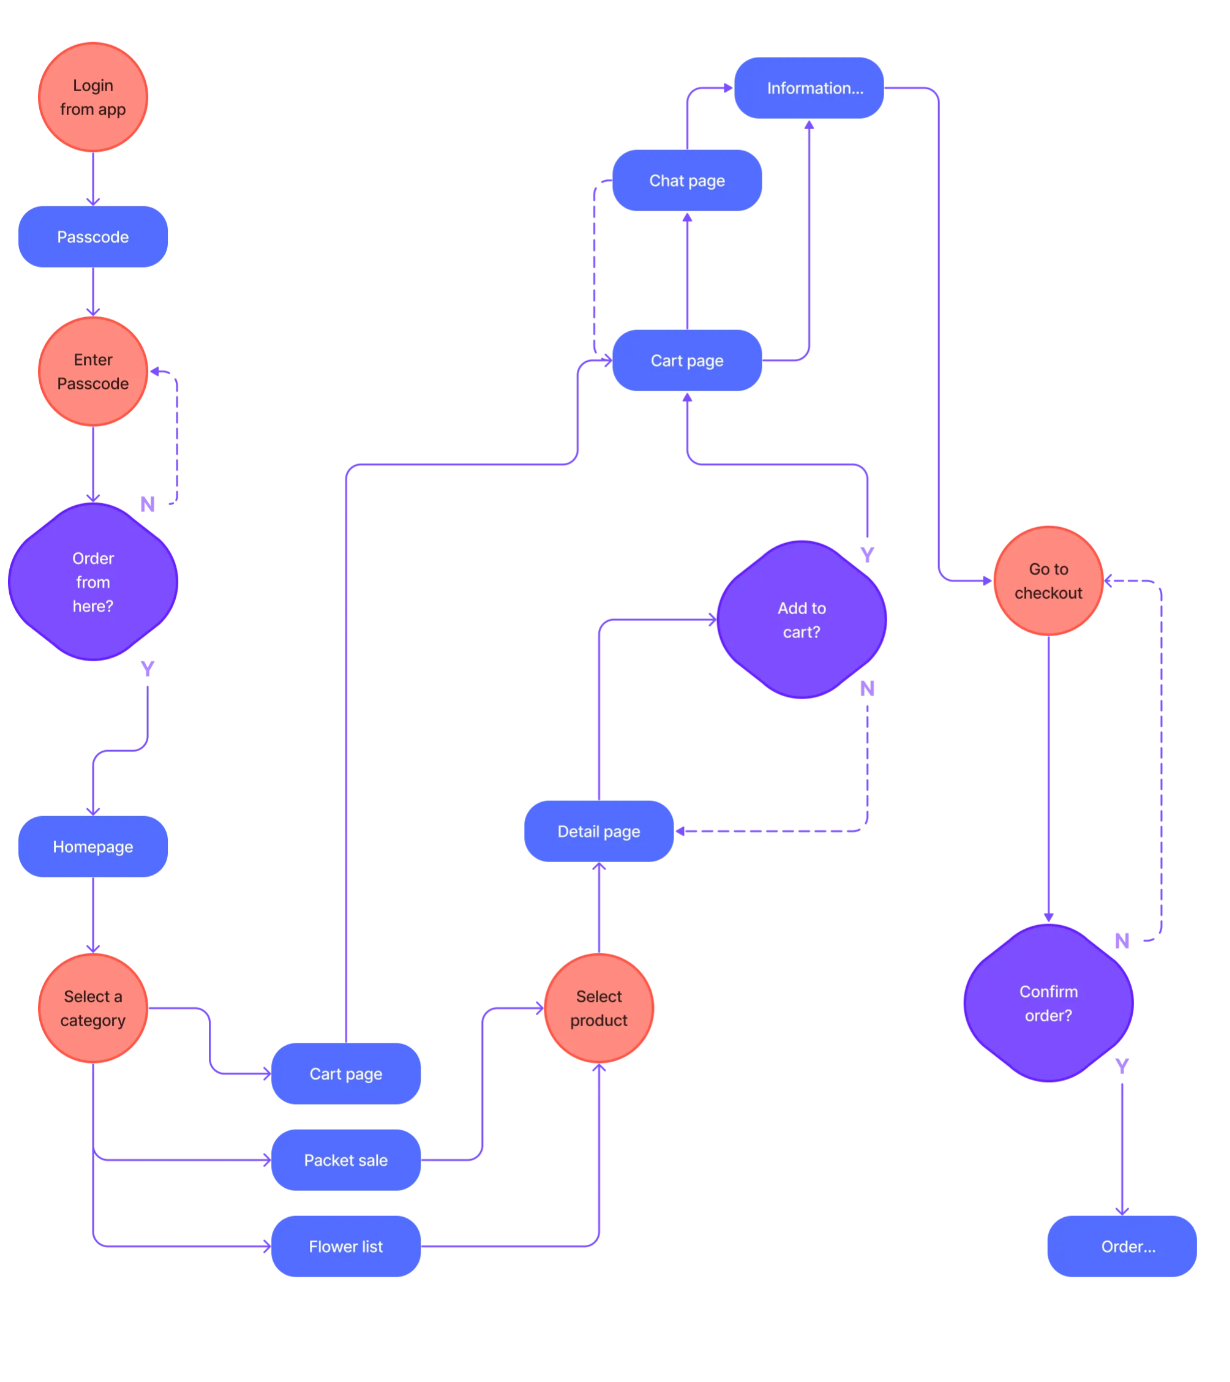
When designing your app, Builder.ai’s app designers create an intuitive user interface (UI) that enhances user experience (UX).
The goal of UI design is to facilitate seamless interactions and guide users through your app's functionalities in a logical manner.
They do this by creating user journey maps, which are key to understanding and meeting real users’ objectives as they flow through your app.
By removing as much friction as possible—for example, resolving unclear calls to action (CTAs) or changing your colour scheme to meet accessibility requirements—you have a far greater chance of establishing a relationship with app users and building loyalty.
Obviously, this is an iterative process and you can use any data you gather to further optimise user experience (UX).
A positive app UX for mobile users focuses on building a user-centric design that is intuitive, accessible and efficient, resulting in increased user engagement and retention.
10 - Create your MVP
A minimum viable product (MVP) is a hard coded but unfinished version of your app, and is the product you typically launch on mobile app stores for early adopters.
We understand that most app projects fail when stakeholders aren’t aligned. That’s why, after choosing your payment plan, we assign a dedicated product manager to your project to manage your app build.
They’re known as Productologists, who ensure app designers and developers all pull in the same direction throughout the whole app building process.
This means the final version of your app stays true to your original app idea.
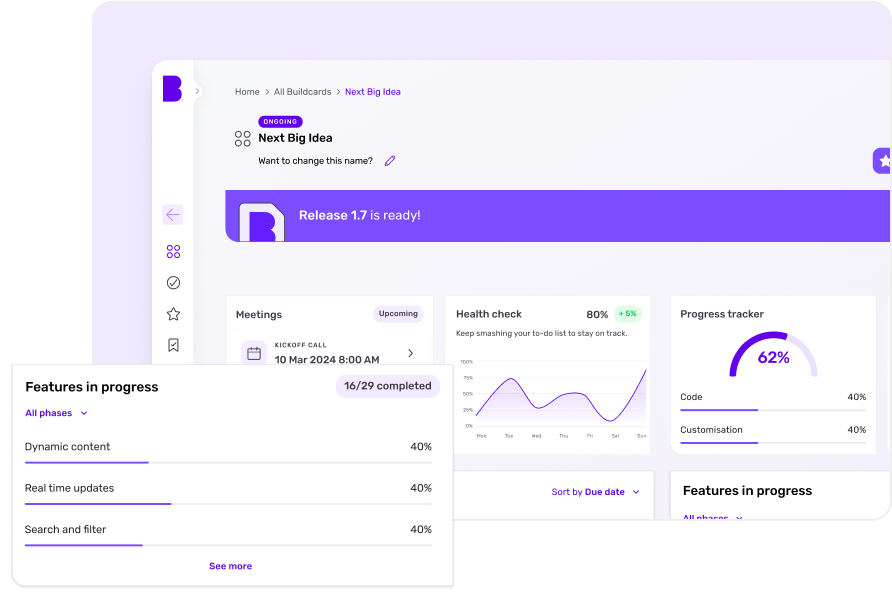
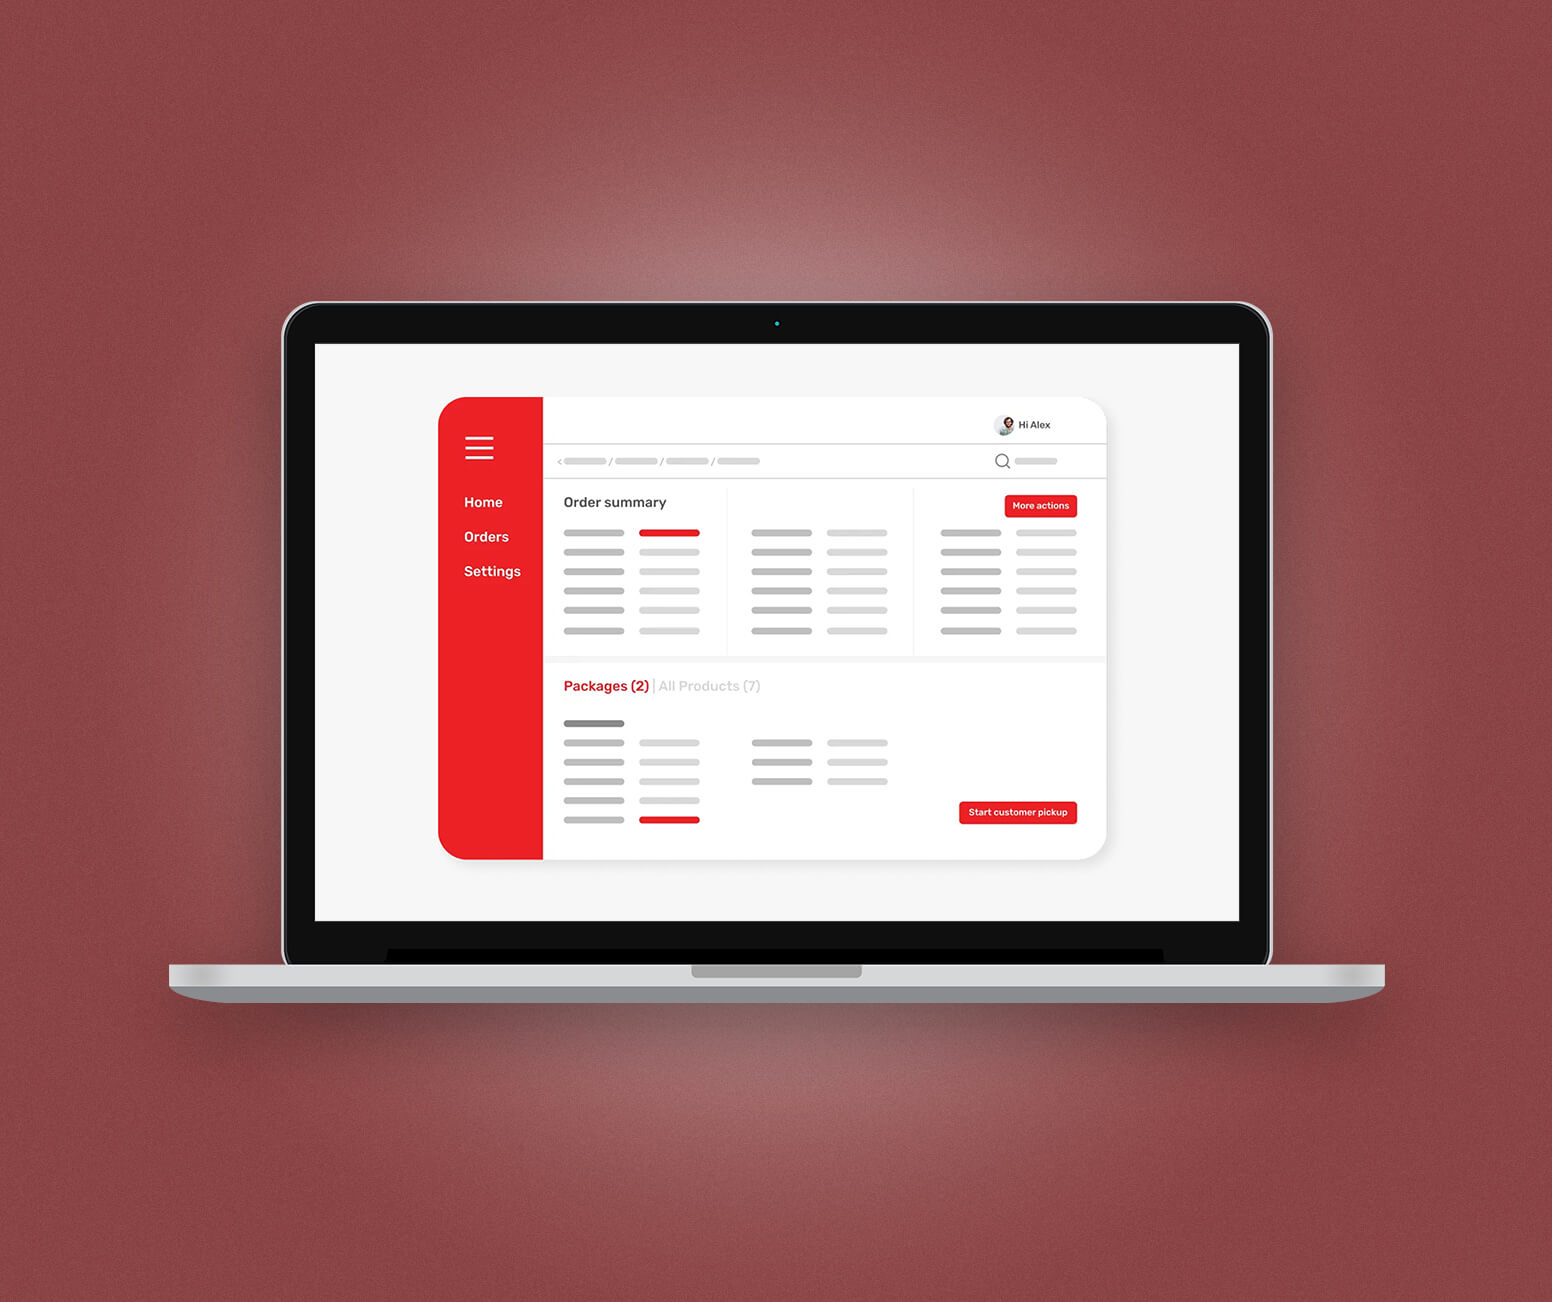
Alt: Builder Studio dashboard screen where users can access all of their project details to date, including their progress and recorded meetings.
Through Builder Home, your real-time project dashboard, you can collaborate with your Productologist, providing feedback on features, bugs and app releases. Here, you’ll also see any actions you need to complete, as well as all of the calls and meeting notes from your project to date.
11 - Test your app
Before your app goes live, it needs to be tested. There are two key approaches to mobile app testing you should be aware of, and combining both of them is likely to yield the best results:
- Automated testing - uses scripts and test automation tools to execute test cases; it can perform repetitive and complex tests much faster than manual testing, allowing for quicker test cycles and more comprehensive coverage
- Manual testing - relies on the tester's creativity, intuition and domain knowledge to explore the app, find defects and assess its usability and overall user experience
To ensure that your app is as user friendly as possible, our team of experts perform a wide range of tests in the testing process, including:
- Functional tests - examines whether your app performs its intended purposes
- Performance tests - assesses your app’s responsiveness, speed and stability under various conditions
- Compatibility tests - evaluates how well you app works in diverse environments, such as different screen sizes and operating systems
- Usability tests - evaluates navigation, content and overall design to decide how intuitive and user friendly your app is
- Security tests - identifies vulnerabilities in your app’s security features, including data protection, encryption and authentication
- Compliance tests - ensures that you adhere to industry specific regulations such as GDPR and HIPAA
Ultimately, with this strategic approach to the testing process, we ensure that you don’t make sweeping changes to your app based only on feedback from rogue users. And by constantly repeating the process long after your app launches on app stores, you’ll ensure long-term high performance for your app.
12 - Prepare for app store launch
Creating an app for a mobile device is like creating any kind of content. Just because it exists, that doesn’t necessarily mean people will discover it.
And the best way to ensure your app reaches the mass market is via mobile app stores.
If you’ve created an Android app, the best places to list your app are the Google Play Store and the Amazon App Store. Meanwhile, if you’ve created an iOS app, the best place to list your app is the Apple App Store.
Whatever your chosen platform, app store optimization will ensure your app ranks above your competitors.
This process entails creating optimised titles and descriptions for your app by including relevant keywords. Meanwhile, adding screenshots and videos that demonstrate your app’s functionality and value propositions will encourage your user base to download.
One thing you shouldn’t overlook is creating a name for your app that sticks in your user’s minds. Your app's name is the first thing potential users encounter and a well-thought-out name can immediately communicate its purpose or the value it can add.
For instance, in food delivery apps, the usage of the words Eat, Deliver and Order is fairly common. "Uber Eats" and “Just Eat” in the UK are prime examples.
Arguably the most important factor, though, are the reviews you’re able to generate from actual security users. And incentivising them for early adopters could propel you to position #1 in the App Store rankings.
Download your mobile app store checklist 👈
13 - Maintain your app
You can’t just set your app live, forget about it and expect it to drive the results your business needs.
That goes for anyone, even if you follow every best practice throughout the app development process.
Bugs will still appear and your software will need to be regularly updated. As a result, investing in app maintenance is essential.
This ensures that all of the efforts you’ve poured into your app don’t go to waste and user experiences remain smooth.
Types of maintenance include:
- Emergency maintenance - takes immediate action to address critical app issues
- Perfective maintenance - enhances the functionality, performance and UX of your app
- Adaptive maintenance - modifies your app so it can adapt to changing dependencies or environmental factors
- Preventive maintenance - identifies and addresses potential issues to your app before they cause major problems
- Corrective maintenance - repairs defects or issues discovered while using your app
- Cosmetic maintenance - makes minor changes to your app’s appearance without interfering with functionality
- Compliance maintenance - ensures your app adheres to specific regulations or standards
- Database maintenance - optimises your app’s database to ensure efficient data storage and retrieval
- Security maintenance - helps you safeguard your app and its data against potential threats
When you create an app with Builder.ai, you get free maintenance for the first year of your app project. Studio One includes ongoing technical support, security patches and bug fixes as well as 24/7 uptime and performance monitoring.
14 - Scale your app
Amazon started out as a bookselling platform. Facebook was born as a tool to rate university students on their looks. Slack was initially an internal communication tool for a small group of video game developers.
Now, not only are all of these companies valued in the multi billions, if not trillions of dollars, but they’re also all completely unrecognisable from their initial purposes.
So to have any chance of emulating their success, you need to keep an open mind when it comes to your long-term app development roadmap.
That means understanding the value your users actually get from your app, rather than the value you think they do. To ensure you do this:
- Listen to user problems and translate them into actionable solutions
- Perform regular SWOT and competitive analyses so you can capitalise on any market opportunities
Builder.ai: simplifying app development with ease and efficiency
The ease of creating an app from scratch depends on the app development route you choose.
But as we’ve demonstrated throughout, Builder.ai makes the process as seamless as possible by:
- Providing a fully managed service
- Guaranteeing your app development costs
- Including app maintenance as standard
Hit the banner below to start your app-building journey with us today 👇
Want to start your app project with us?
Book a demoSpeak with one of our product experts today.
By proceeding you agree to Builder.ai’s privacy policy and terms and conditions

FAQs
If you want to learn more about the app building process, check out the FAQs below 👇
How much does it cost to build an app?
The cost of an app can range from $5,000 to $500,000. Builder.ai gives you custom pricing for your app project because we charge per feature. Our AI fits all your features together and lists all your app development costs in a Buildcard before you pay for your app, so there are never any uncalled surprises.
Can I teach myself to build an app?
Yes, you can teach yourself to build an app, but it takes time and effort. You’ll need to learn coding languages like Swift or Kotlin, along with UI/UX design, databases, and cloud services. If you want a faster, more efficient way to build an app without deep technical knowledge, platforms like Builder.ai let you create custom apps without needing to code everything yourself.
How hard is it to build an app?
How hard it is to create an app depends on your technical expertise. If you’re a programmer or you can code, you can create mobile applications independently, using online resources to upskill yourself. If you can’t code, you can use a no-code app maker, an app development company or Builder.ai.
How do I create my own app for my business?
To create an app from scratch, you need to: 1 - Define your goals | 2 - Get a problem statement | 3 - Perform competitive analysis | 4 - Choose an app template | 5 - Customise app features | 6 - Decide your launch platform | 7 - Get a breakdown of all your app development costs | 8 - Design your app | 9 - Map out user journeys | 10 - Create your MVP | 11 - Test your MVP | 12 - Launch your app on app stores | 13 - Maintain your app | 14 - Continue developing your app
How long does it take to create an app?
A more complex app takes longer to build.
Our Studio Store apps can be up and running in as little as 2 weeks. Studio Store apps are pre-packaged mobile apps for small businesses with customisable branding.
An enterprise app that needs to do new, complex things and integrate with legacy systems will take longer. Most of our customers are somewhere in between.
But unlike others, you don’t have to cross your fingers about timings. We use AI (which uses every app feature we’ve ever built to spot patterns) to get you an accurate timeline before you start.
Entrepreneurial senior management executive of fast growing technology businesses. Successful in taking ideas from concept to profitability, using a blend of lean, agile and rapid result methodologies. A background in building and managing cross-functional and hybrid teams, with a record for retaining talented individuals and delivering results. Skilled in developing and maintaining a clear product and project vision, strategy and roadmap. Willing and able to adapt to changing environments. Often named as a Crisis Manager with a vision to “Make Things Happen”.






 Facebook
 X
X LinkedIn
 YouTube
 Instagram
 RSS
RSS


