I’ll bet you $10 that if you’re thinking of building an app, you already have a laundry list of features in mind … but you haven’t quite figured out how they’ll fit into a seamless user journey.
Creating an app from scratch is similar to crafting a good story. Like a story needs a good flow, your app, too, requires a logical flow that enhances the user experience (UX).
This is where user flow diagrams come in.
A user flow diagram helps you plan how users interact with your app and the steps required to complete a task. Planning these journeys creates seamless experiences for your users.
In this blog, we’ll talk about the benefits of user flows, how to create a user flow diagram and user flow best practices.
Let’s dive right in 👇
What is app user flow?
An app user flow is the visual representation of the sequence of steps a user takes while interacting with an app. It’s a blueprint for how users navigate through your app to complete a task. A user flow outlines a path that users follow from their initial interaction, through various screens and ending with a completed action.
Think of user flow like the road system of a city. Just like some roads go from point A to point B while some are a one-way street, user flow maps out all the possible paths a user can take within the app.
User flow helps you:
- Identify different entry points where users start their journey, such as a home screen or a notification
- Map out screen transitions to illustrate the connection between screens and UI elements
- Account for decision points where users must make a range of choices, such as selecting product variants, adding to a cart or choosing payment methods
- Optimise for efficiency by streamlining the user’s journey and minimising unnecessary steps
Remember, the user flow focuses on designing your app in a way that makes it as intuitive and user-friendly as possible.
When is the app user flow made?
A natural question that may arise at this point is, at what stage in the app development process are user flows created?
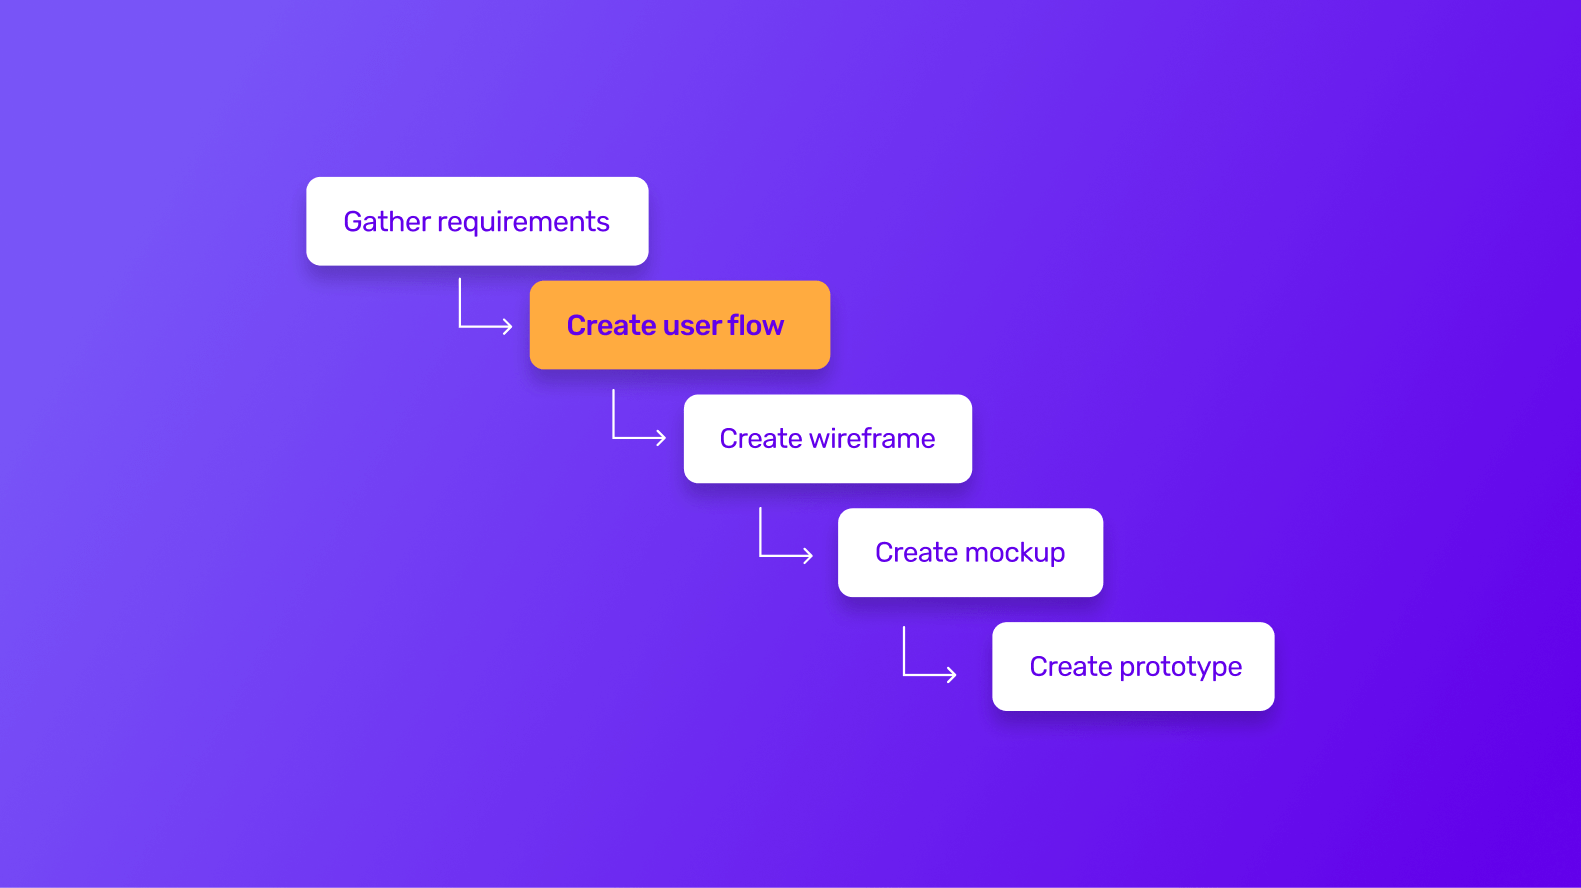
A user flow is created at the very first stage of app design — design planning. Only after creating user flows does your mobile app go into the design stage and create wireframes, mockups and prototypes. This is because user flows serve as the foundational structure of an app’s design.
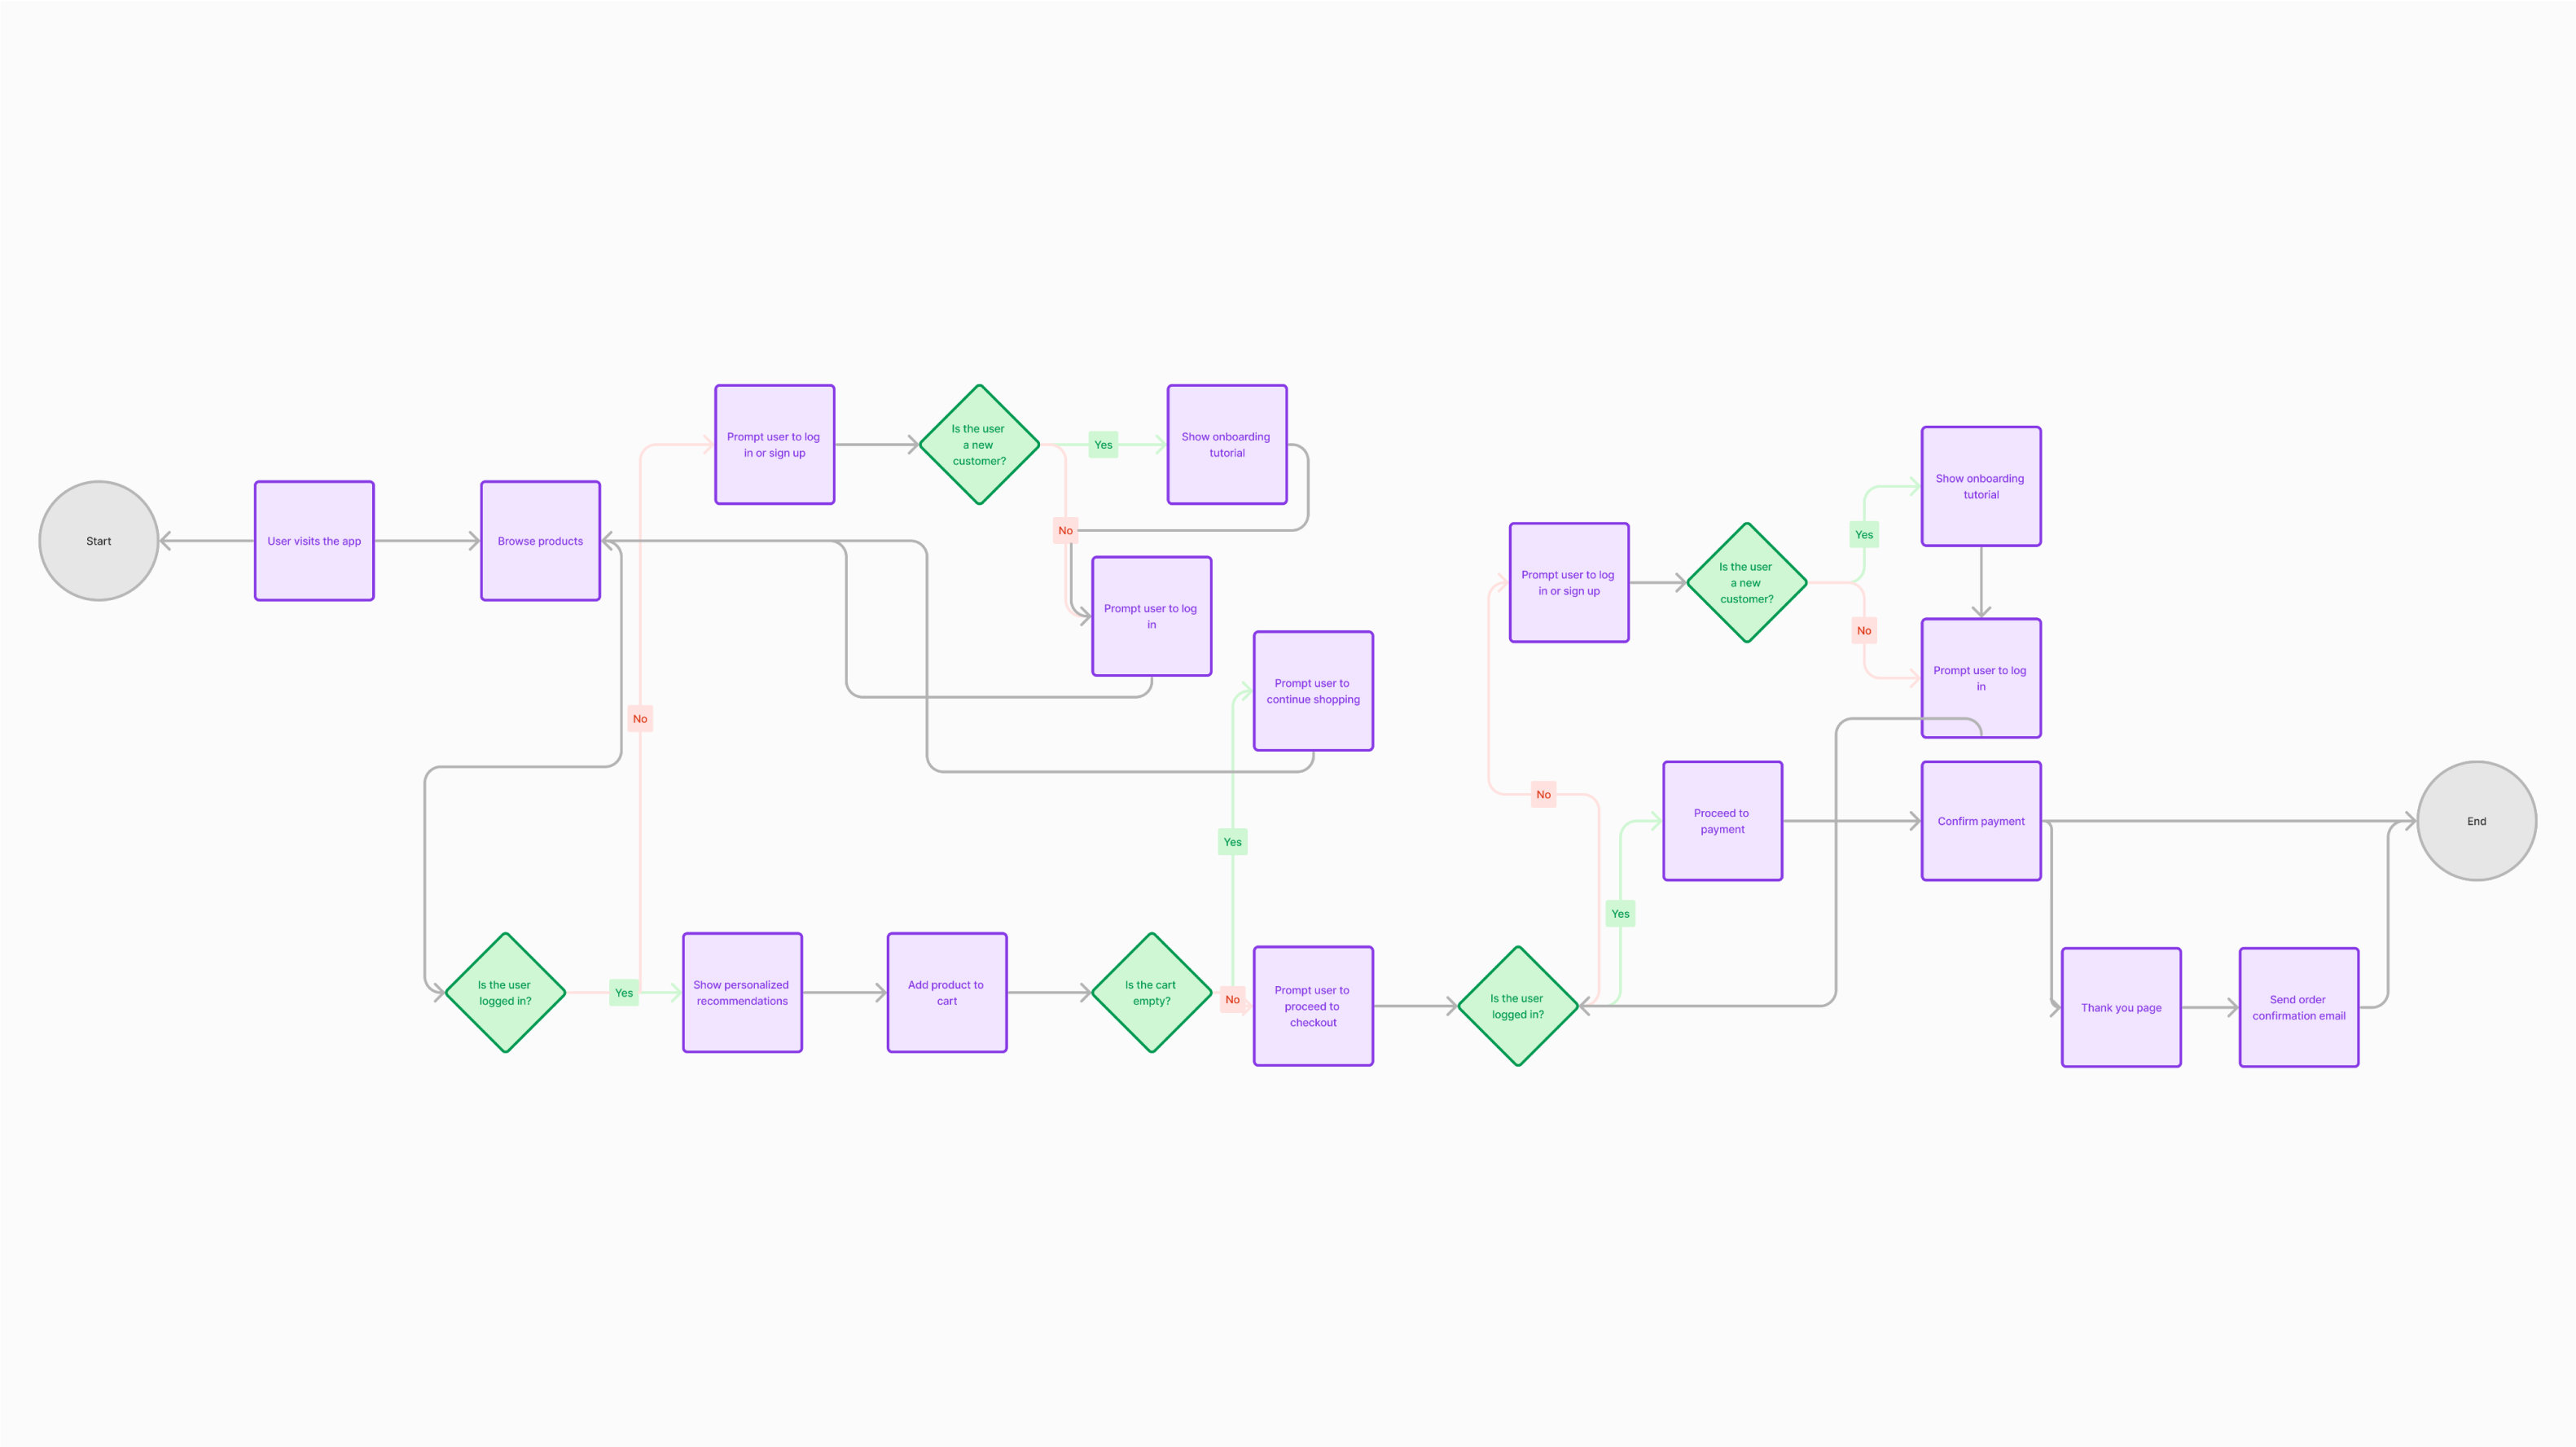
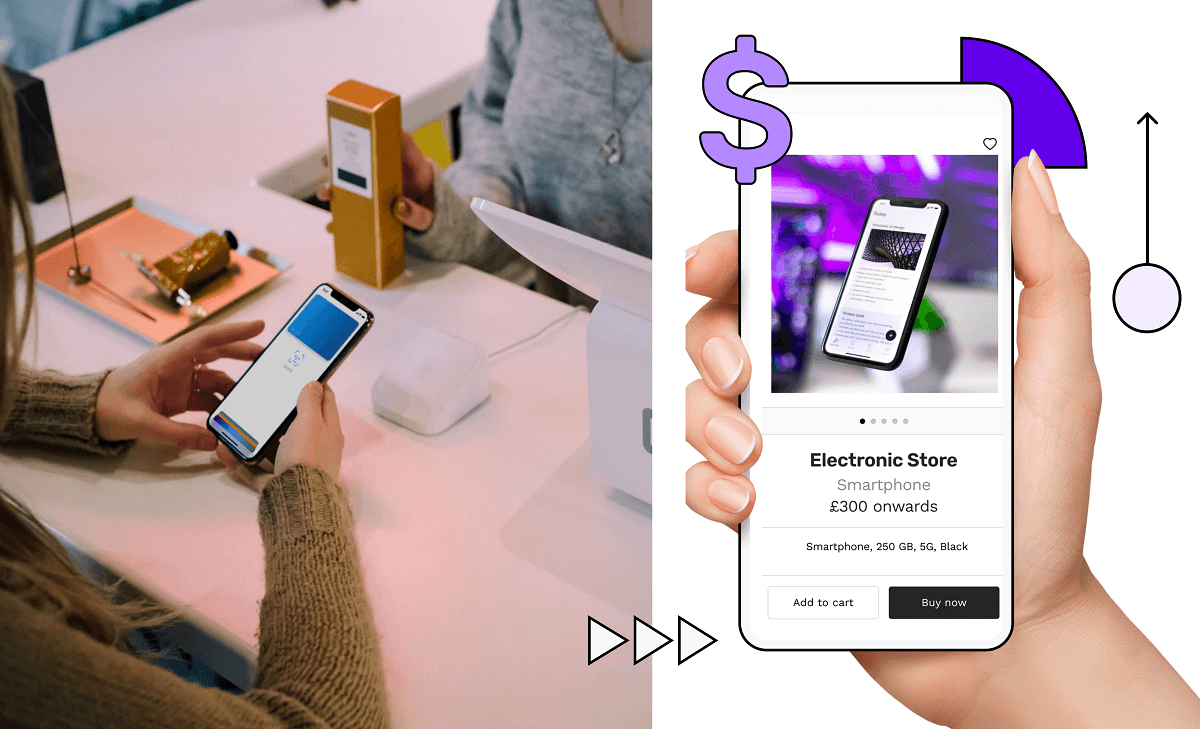
Let’s look at a user flow example of an ecommerce app. The objective here is to map out the journey a user takes from initial interaction to completing a purchase. 👇
- The user is greeted with a login screen. After logging in, they'll land on the home screen to find features like search filters and product categories like clothing, electronics or home accessories.
- The user can tap on a specific product page to view more details like product description, price, reviews and availability.
- If the user decides to purchase the product, they can click the “Add to Cart” button and proceed with the checkout process.
- After completing the checkout process, the user receives an order confirmation message and returns back to the home screen to continue browsing other products.
Benefits of making user flows
User flows provide a birds-eye view of the structure of your app. This provides benefits to both designers and app owners 👇
Benefits to designers
1 - Less time iterating
A well-defined user flow provides a clear roadmap for app development, reducing the need for extensive iterations later in the process. It tells your designers how a path may not be ideal, helping them identify and clear out friction points.
Rather than having to constantly revisit the app's fundamental structure, it allows them to focus on refining features and mastering user experience, saving time and streamlining the development process.
2 - Eliminate bottlenecks
User flows help UX designers identify points of friction to make navigation fluid. By visualising the customer journey from start to finish, designers can look for confusing paths and address these bottlenecks early in the design process.
For instance, if a feature looks more complex than initially anticipated, UX designers can redesign the navigation to deliver a seamless experience.
By eliminating complications in pathways, you not only enhance the user experience but also prevent users from abandoning your app out of frustration.
3 - Helps create an intuitive app interface
By mapping out the sequence of interactions and transitions between mobile screens, your designers can identify opportunities to streamline navigation and minimise friction.
This ensures that your users can easily find what they need and accomplish their goals without confusion.
Benefits to app owners
1 - Alignment with user needs
User flow ensures that the app design remains aligned with user objectives.
By focusing on user goals and outcomes, user flow ensures that the app you develop meets their expectations and addresses their pain points effectively.
2 - Better understanding of user behaviour
By analysing user flow data, you can get a deeper understanding of user preferences and patterns and can identify app monetization opportunities.
For instance, you can place in-app advertisements in high-traffic areas of your app or offer in-app purchases based on their preferences.
3 - Fosters better communication
Let’s say you want your app to have a login feature. You’d pictured users verifying via email ID and then going to the home screen. However, the designer thinks of using the phone number as a login method and after logging in they’d go to their profile page and not the home page.
Here, a user flow enables you and the designer to communicate how actual users will navigate through the login process and where they’ll land after logging in.
You can discuss this with your designer and other stakeholders to work on the best approach for implementing the feature, leading to a more cohesive app design.
How are user flows different from user journeys and wireframes?
While user journey, user flow and wireframe play crucial roles in app design, each serves a unique purpose and focuses on different aspects of the app design.
User flow vs user journey
User journey | User flow |
The series of steps a user takes in the app | Visual representation of the path users take through the app |
Depicted as a linear sequence | Visualised as a flowchart or a diagram |
High-level concept that factors in a users emotions | Purely focused on movements within the app |
Goal is to complete specific tasks seamlessly | Goal is to optimise the user’s path and clarify navigation |
While an entire user journey map provides a holistic view of the user’s overall interaction with the app, user flow offers a more detailed and focused representation of the sequential steps users take to complete a specific task within the app.
Essentially, user flow focuses on the functional aspects of an app experience, like highlighting the sequence of screens, actions and decisions users make while performing a task.
Let’s illustrate this with an example.
For a flight ticket booking app, a user journey includes steps like opening the app, searching for flights, entering passenger details, completing the payment process and receiving booking confirmation.
However, user flows go much deeper to detail the specific screens, input fields and user actions. The user flow will detail steps like selecting the "Book a Flight" option from the app's homepage, entering the departure and destination cities, choosing travel dates, selecting a preferred flight option from the search results and more.
User flow vs wireframe
Wireframe | User flow |
Visual representation of app screens and layout | Visual representation of the navigation |
Helps designers visualise app interface | Helps designers understand the structure of the app |
Depicts basic elements of the screen like text, images and buttons | Maps out the sequence of user interactions |
Goal is to define the layout and structure | Goal is to ensure a seamless user experience |
While a user flow represents the path a user takes in the app, a wireframe outlines the layout, structure and functionality of your app’s screen and features.
Wireframing helps you visualise how your app is structured before delving into the actual app design and coding. It also helps you find inconsistencies in the app structure so that you can rearrange and refine it.
Only after creating a user flow, you proceed to wireframe and both play complementary roles in designing an intuitive user interface (UI).
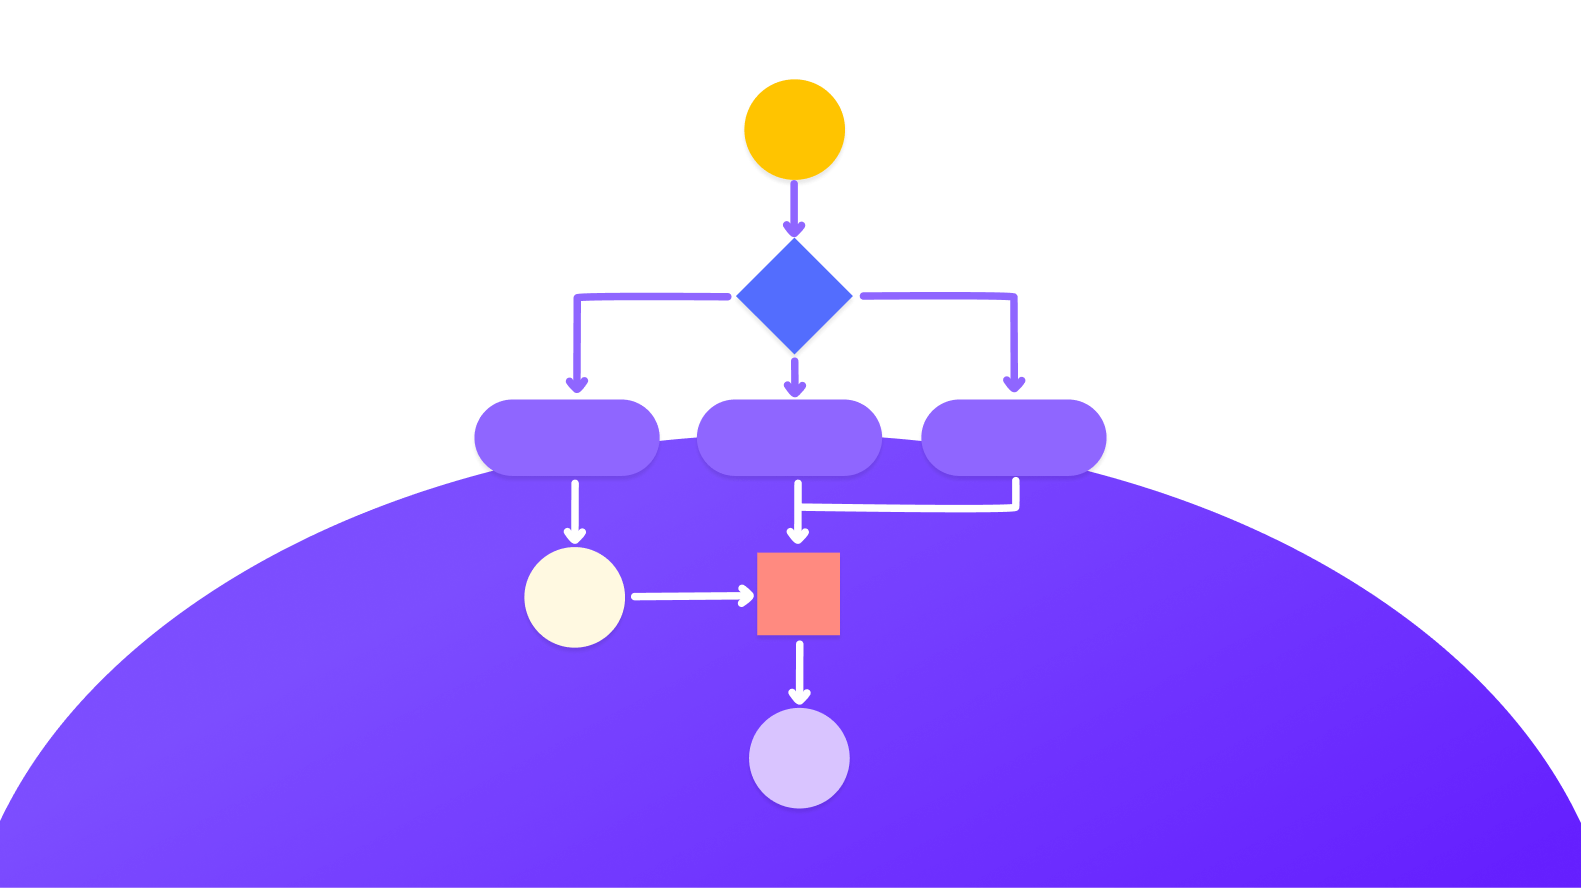
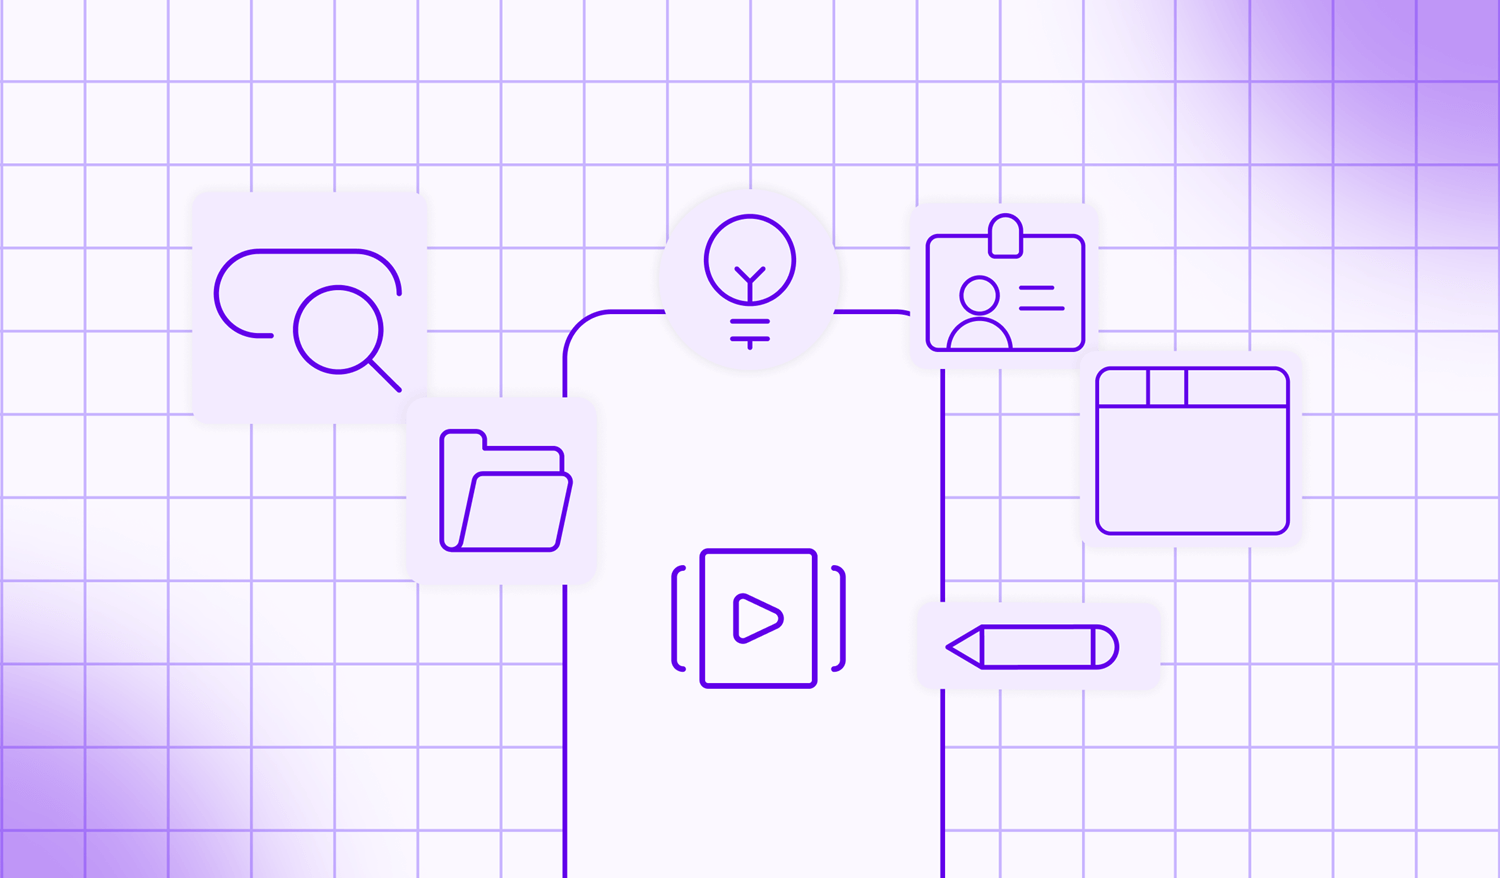
What are the components of a user flow diagram?
A user flow diagram consists of several symbols. Each symbol represents a specific interaction within the pathway. Let’s understand their significance.
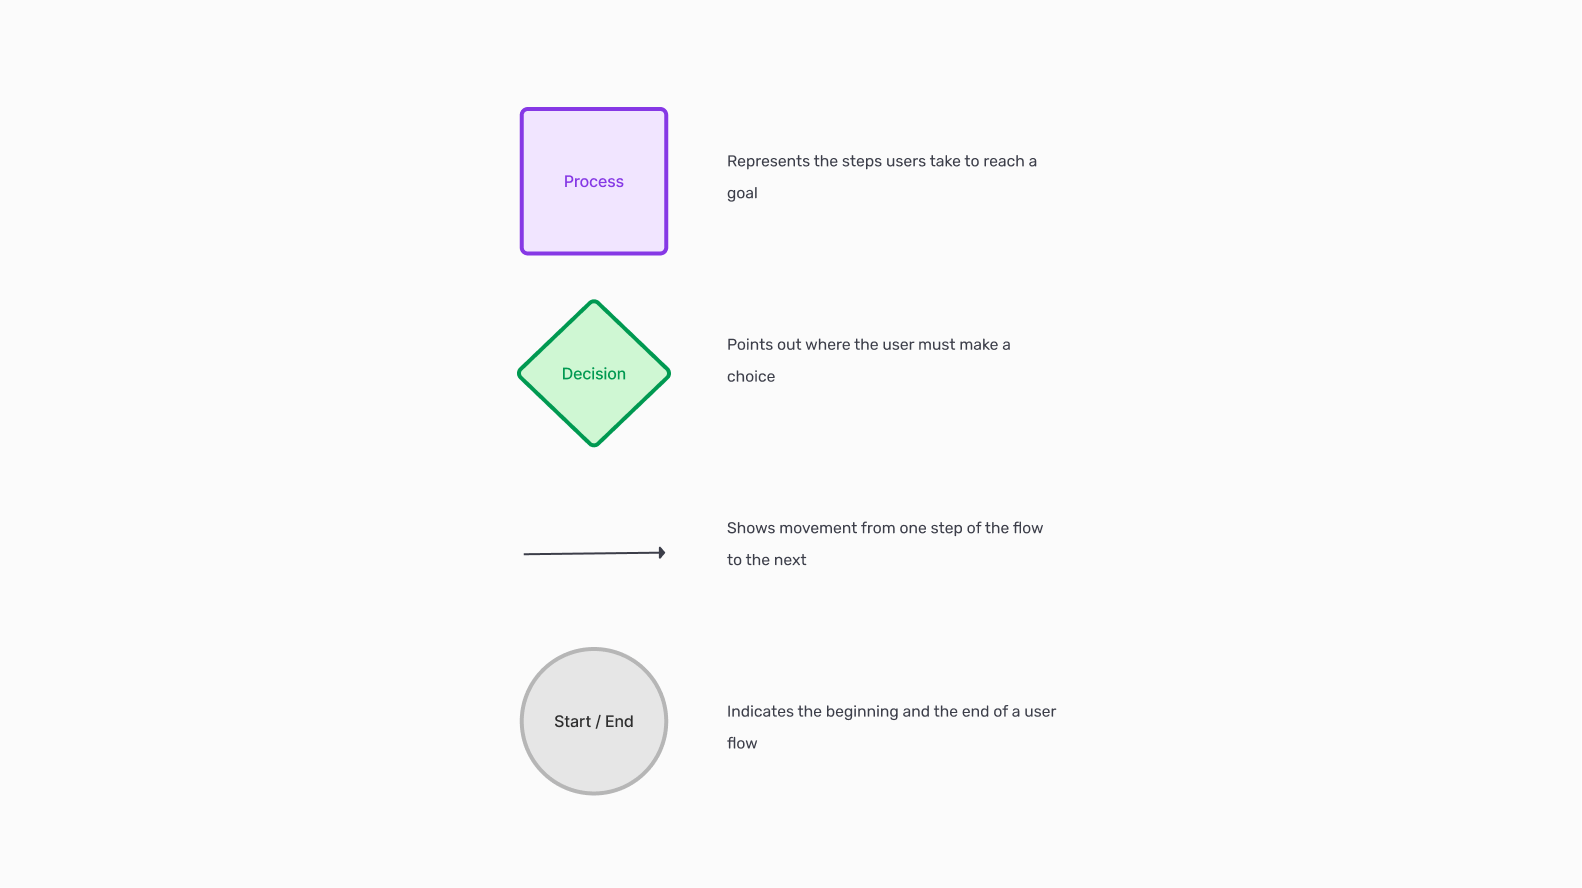
1 - Rectangle
This is arguably the most common shape used in user flow diagrams. They usually represent the steps a user takes within an app to reach a goal.
They’re the individual screens or pages within the app, such as the home screen, product details page or checkout screen.
2 - Diamond
They’re also known as decision diamonds. They indicate a user action within the flow and always take a question. The possible answer is represented by the lines and arrows extending out of the diamond shape and determines which path to follow.
For example, you can ask questions like “Do you want to sign up?”, with yes and no arrows coming from each end of the diamond.
3 - Lines and arrows
The most important symbol of user flow diagrams, lines and arrows connect the various components of the user flow. They show the sequence of interactions and transitions between screens and guide the user to the endpoint.
4 - Circle
A circle denotes the starting and ending points of the user flow. It tells where the flow begins and the completion of a task or user journey is.
5 - Annotations
Annotations are the additional notes added to the diagram to provide context for specific elements of the user flow.
Using these symbols, you can illustrate how users navigate through your app and the decisions they encounter along the way.
How to create a good user flow diagram?
Creating an app user flow diagram isn’t mere guesswork. You need to work with the development team and make sure you follow these steps 👇
1 - Understand your requirements and objectives
Before diving into creating your user flow diagram, you need to have a crystal clear understanding of your app’s purpose, user personas and business goals. This will enable you to align your user flow diagram with your business and users objectives.
At this stage, try involving other team members from marketing, finance and product to identify objectives. Depending on your business, these objectives can include objectives like increasing revenue, expanding market share or enhancing customer satisfaction.
The clearer your understanding of your requirements and user personas, the better you can explain this to the design team, and thus the better the final version of your app will be.
2 - Identify the app’s key features
Once you know your requirements, the next step is to start collating key app features that support your business objectives.
Here, you need to start looking from a user’s perspective and therefore define each feature’s scope and purpose to make sure they align with the user’s needs.
Prioritise features based on their importance to the business objectives and sideline those that are of less importance. You can do this by using a prioritisation matrix. This will help you save on app development costs by eliminating what’s not required and, at the same time, reduce development times.
3 - Build a high-level user flow
At this stage, you need to create flow chart diagrams to visualise the high-level user flow of your app. You can use various tools like Miro, Mural and Lucidchart.
To do this, you need to map all the touchpoints where your user may create contact with your app. To keep it simple, start with the user’s entry point into the app and outline the main actions they’ll be performing to achieve their goals.
The main objective of this step is to visualise how your app will solve the problems of your users.
4 - Create specific user flows
Once you have a high-level user flow, the next step is to make user flows for specific features or tasks within the app.
These specific user flows break down the larger customer journey maps into smaller, more focused pathways, providing you with a more granular understanding of how users will interact with individual features of your app.
By creating detailed user flows, you can address the nuances of different user interactions and ensure that each feature or task is designed to meet user needs effectively.
5 - Identify bottlenecks and optimise
Once you have all your user flow charts laid out in front of you, you need to analyse them to identify bottlenecks and areas for improvement.
Try figuring out where users may encounter difficulties or might drop off altogether. Look for common pain points, such as complex navigation or lengthy processes, as they may hinder the user's progress.
Take active feedback from your team members and make it a priority to optimise them based on their impact on the user experience and business objectives.
Best practices for creating effective user flow
Let’s dive into the best practices you should follow to create the best possible user flow. 👇
1 - Keep user goals at the centre
The ultimate goal of your app design should be to help users accomplish their goals efficiently. Keeping your users at the centre of the user flow helps you prioritise what matters to them the most.
For instance, in a food delivery app, the primary goal of the app is to enable quick and easy food ordering. Keeping this at the centre, you can design your app towards achieving this objective.
However, distracting from it, your app can get cluttered with irrelevant screens like complex login, premium subscriptions or promotional pages that distract the user away from the core task of quick food ordering.
2 - Create a critical path
A critical path is the shortest, most logical path, which minimises user effort and maximises efficiency.
By creating a critical path, you reduce the number of interactions required for users to accomplish goals and, at the same time, ensure users accomplish their objectives without getting sidetracked by distractions.
Focusing on creating direct routes, your user flow diagram becomes more fluid, allowing users to navigate with ease.
3 - Avoid too many multidirectional arrows and loops
Too many multidirectional arrows and loops create confusion for users and can overwhelm them in understanding the intended sequence of actions.
Instead, keep the flow as linear as possible and minimise the use of complex patterns. Your users should be able to follow the path from one screen to the next without getting lost.
4 - Consider edge cases
Considering all possible scenarios while creating user flow diagrams, ensure that your app design accounts for different interactions and situations.
For instance, in a food delivery app, a user might try to order an out-of-stock item. This can crash the app or create false orders, leading to frustration or negative reviews.
Accounting for edge cases in user flow, you can display notification indicating unavailability of the item and provide alternatives suggestions.
It makes your app more robust as you can easily anticipate the likelihood of errors and unintended outcomes. By designing the user flow to handle diverse user interactions, you can reduce the risk of user frustration and improve user satisfaction.
5 - Check the effectiveness
Once the app is live, you can test and amend your user flows. By checking the effectiveness of user flow, you make data driven decisions about which flow performs best or highlight the area of friction.
You can check the effectiveness of user flow by using tools like Google Analytics 4, Hotjar and Justinmind.
Conclusion
It’s impossible for any app designer to maintain a clear picture of every pathway and interaction in an app. That’s why they need to be written down as user flows.
User flows are a simple yet powerful technique that helps you track and plan user interactions, ensuring your app design focuses on meeting the needs and expectations of users.
When you create an app with us, we always ensure that detailed user flow diagrams are created and finalised by you before your app goes to design. To further improve collaboration and communication throughout the app development process, we enable you to:
- Track the progress of your project in real time
- Communicate, collaborate and provide user feedback on feature releases
- View all your project history to date
If that sounds good, hit the banner below and kick off your app project with us today 👇
Want to start your app project with us?
Book a demoSpeak with one of our product experts today.
By proceeding you agree to Builder.ai’s privacy policy and terms and conditions

Natasha is a Productologist at Builder.ai. She has over 14 years of experience in product management expertise, specialising in Agile methodologies and product development to transform client visions into cutting-edge app and web solutions. Her skills extend to key account management, digital strategy, marketing management and integrated marketing.


 Facebook
 X
X LinkedIn
 YouTube
 Instagram
 RSS
RSS